The default WP-Cron does not run continuously, which can be an issue if there are critical tasks that must run on time. There is an easy solution for this. Simply set up your system’s task scheduler (Cron Jobs) to run on the intervals you desire (or at the specific time needed). The easiest solution is to use a tool to make a request to the wp-cron.php file.
Firstly, we need to disable the default WP-Cron in the wp-config.php file. Open the wp-config.php file for editing and add the following line:
define( ‘DISABLE_WP_CRON’, true );
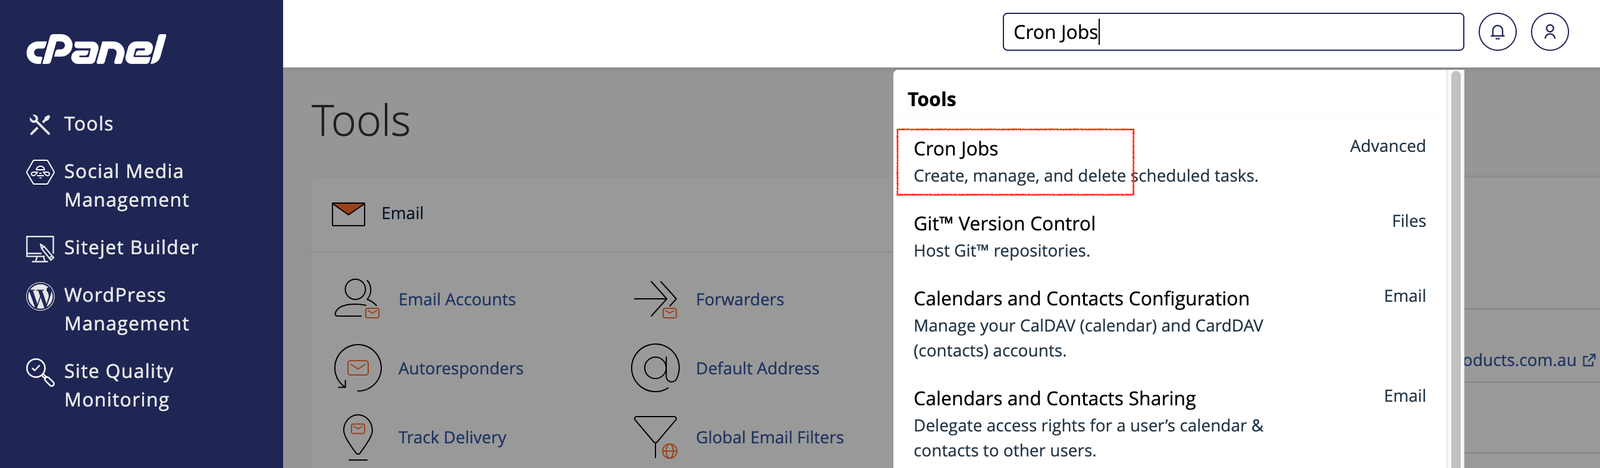
On your cPanel account (hPanel, Direct Admin, ..etc are the same), use the search box to search for page Cron Jobs.
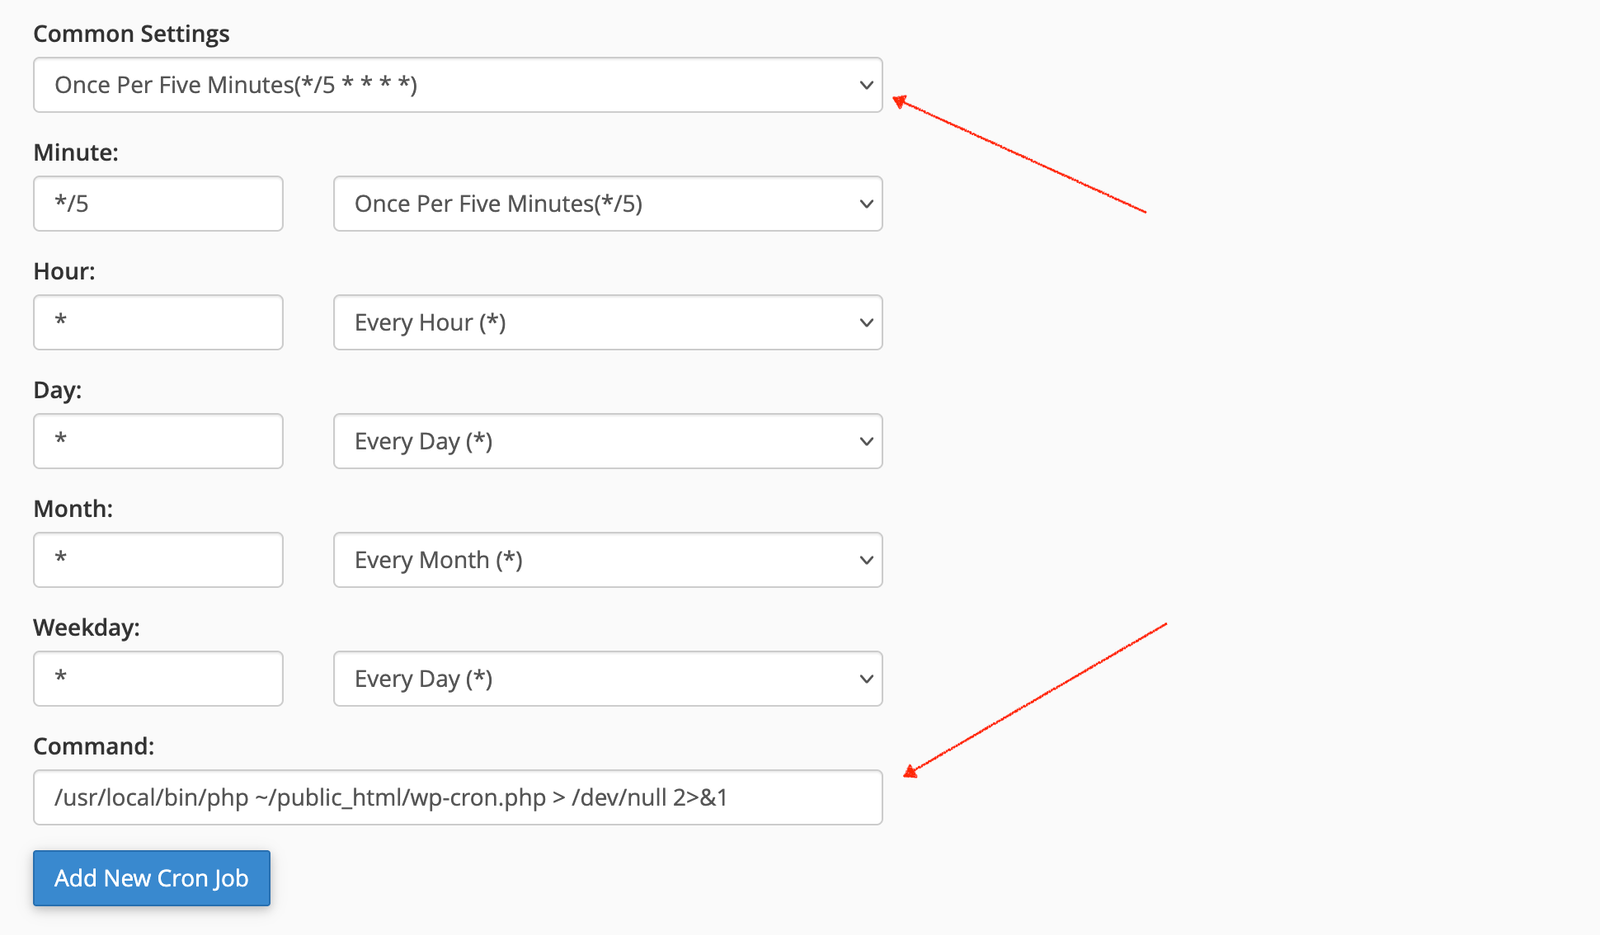
On the Cron Jobs page, choose the preset Once Per Five Minutes(*/5 * * * *), then add the following command:
Notes: depends on your server, you may have to change the folder public_html to the other name such as httpdocs, domains… etc. See the plugin’s settings page to know the exactly command and copy from it.
This would look like the screenshot:
After clicking on the Add New Cron Job button, you command will be added into the list at the bottom of page, some thing like this: